
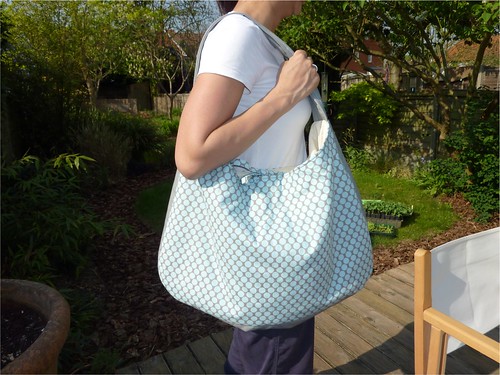
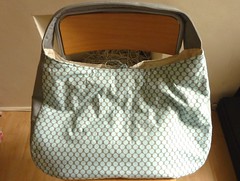
"V" modelling her lovely new bag!
So, my friend V's gorgeous baby boy is a few months old now, and we headed over to her place yesterday for an Easter-time BBQ in the London sunshine - this will be the first time I get to meet the little man! I'd already made her a gift of some dummy/pacifier clips when he was born. And, around the same time I started work on a nice big denim bag for Mummy V to tote around all of his stuff in, I also offered to make a baby-carrier (and I bought all the supplies ready to make The Pea Pod Carrier as featured on the tutorial over on Sew, Mama, Sew!). Unfortunately, my offer slipped V's mind and she bought one from the shops (*sighs*). Ah, well my youngest brother and his lovely wife are expecting their first child very soon - so I'll make one for them instead (I can't wait to be an Auntie - lots of opportunities to make cute 'n' dinky kiddie stuff yay!).
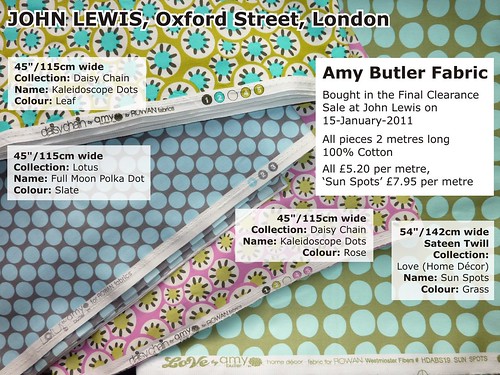
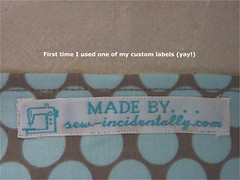
I'd emailed V earlier last week showing her the x2 spotty fabrics I though would suit the baby-carrier (some lovely Amy Butler fabrics I got on Sale in the big John Lewis department store on Oxford Street). It was during this emailing to and fro that I found out that she already had a carrier - so we switched to plan B, and I made her the lovely bag below instead! And, it's the inaugural use of my labels (I was most chuffed to be able to use them)!
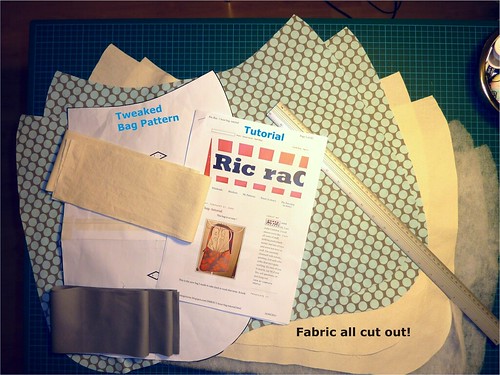
V needed something nice 'n' roomy to take all of baby's stuff to the beach in. So, I searched for a simple bag to make her, I found this tutorial for a 1-hour bag.
The tutorial has you easily draft you own pattern onto an A4 piece of paper (I used my computer and did the drafting on my screen). The size was a little small for V's needs, so I increased it by 180%. This made it too long (LOL!), so I took out an 8 cm horizontal fold/tuck from the middle and redrafted the curve on the side.

I loosely followed the overall steps in the original tutorial (see below).
Outline of original construction method:-
(Clipping curves/corners, trimming/grading seam allowances, and pressing as you go)
(1) Sew the pocket pieces together.
(2) Sew the pocket onto 1-side of lining.
(3) Sew the lining pieces together at sides and bottom only (leave gap at bottom to turn inside out).
(4) Sew wadding (batting) to each separate side of the outer/fashion fabric.
(5) Sew together the outer/fashion fabric sides - at sides and bottom only
(6) Sew the fashion fabric + the lining together at top (right sides facing each other).
(7) Turn right side out.
(8) Attach magnetic clip/closure to top-centre of bag.
(9) Sew the strap pieces + wadding together.
(10) Sew the strap onto the bag (at the sides) and add buttons.
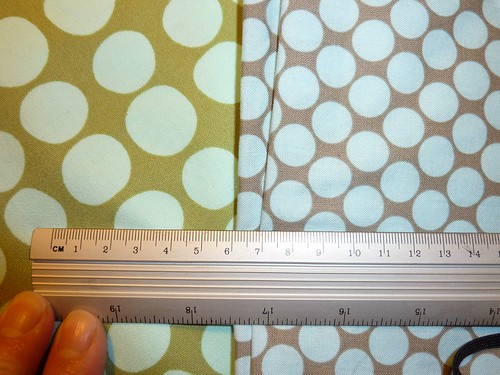
I wanted more room inside of V's bag - so I needed to add some width. I did this by inserting a long grey rectangle of fabric (the finished width of the rectangle was 8cm) all around the sides and bottom. Also, I knew that a lot of stuff would go into the bag and I wanted it sewn on really strong to take the weight - so I changed how that was attached too. I also wanted to use ties vs. a magnetic-clasp as a closure, as I thought it might help to pull-in and control any tendency of the full-up bag from spreading open at the top. I used the grey/blue spotted polka dots fabric for the outer fashion fabric, and I lined it with medium weight cotton calico (Muslin). All the fabric was sat in my stash ages ago - all pre-washed and pressed and ready to go :)
MY Outline of tweaked construction method:-
(1) + (2) Same as above.
(3) Sew each calico lining piece to a long calico rectangle at the sides and bottom only (leave gap at bottom to turn inside out).
(4) Sew wadding to each separate side of the outer/fashion fabric + onto the long grey rectangle.
(5A) Sew together the outer/fashion fabric sides to the grey rectangle - at sides and bottom only.
(5B) Sew up the x2 narrow straps/ties (20cm long each) from fashion fabric.
(5C) Sew 1-tie onto each side of the lining - at the top, centre (I sewed over 4 times for strength!).
Moved up in sequence = (9) Sew the strap pieces + wadding together.
Then... Sew straps to the sides of the fashion fabric - lining them up with the width of the grey side-sections carefully.
(6A) Sew the fashion fabric + the lining together at top (right sides facing each other).
(6B) Sew over the area where the straps are attached 3-4 more times for additional strength.
(7A) Turn right side out
(7B) Topstitch opening edges of bag.
(8) + (10) = [Not applicable in my version]

To make the ties:-
- I cut x2 rectangles of the fashion fabric approx. 5-5cm wide, by 20cm long.
- I pressed the fabric half along the longest length (wrong sides facing one another).
- I then pressed 1 long raw-edge of the fabric into the centre (again wrong sides facing each other).
- Next, I pressed the remaining long-edge into the centre.
- Then I folded and pressed the fabric in half (to enclose the raw edges), and I tucked 1 of the short-ends in too (trimming the corners to reduce bulk).
- Then I topstitched all the way around (from the folded-in short-end, around the corner and along the folded-in long edge).
Things I had to fiddle around with....
- My wadding was pretty thick - but I found I could carefully tear it into 2 thinner layers (I kept it thick for the strap though).
- To be economical when cutting out the wadding for my rectangular side-section, I cut it out as too halves. I then zig-zagged the 2-pieces together over the top of a small scrap of calico to piece them together.
- I adjusted the strap width to match my new grey side-sections.
- I decided to use 2-threads for topstitching from the top needle thread (pale-blue thread along strap, browny-grey thread along the top-edge of the bag opening) - this gave me a nice thicker looking line.
- I used a longer stitch length for the topstitching to make it stand out more too.
- I needed to use a Size 16/100 Denim needle to topstitch along the strap and bag opening (as well as when I sewed the straps on extra strong LOL!) - it had to be a thicker needle to cope with all the layers of fabric and wadding.
- I hand-finished the topstitching at the ends of the bag opening (I left long tails of thread at each end to do this). Back-stitching would have looked a bit bulky and untidy otherwise, and as the topstitching was for "looks" only this was a nice way to finish it off.
- I tried to pin my label in place on the pocket (which is small and tricky to sew accurately on the machine) but it looked all bumpy and misshapen pined like that. So, instead I hand basted it in place and then stitched with white thread on top in a very short stitch length as close to the label's edge as I could get to make it look very posh (hehe!)
- I had to figure out a new strap length. Because I'd changed the dimensions of the pattern the original strap length would no longer work. I used masking tape to temporarily attach my tape measure to one end of the bag. I then stood in front of the mirror and moved the position of the tape up/down to find the NEW correct length :) (Sorted!).
Errors I made along the way...
- I got tired and careless at one point during sewing-up the side-seams and I veered off course on my seam allowances. I had to go back and unpick it and start again (that's late night sewing for you ha!)
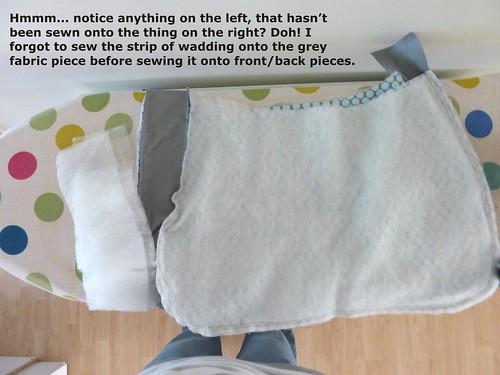
- Again, when tired I forgot to sew the wadding onto the grey rectangle side-section. So, instead of unpicking and re-sewing the [now already clipped corner-curves] I hand-basted the wadding to the seam allowances instead.
Here's some pics of V, and the new bag :)


Post Title: Bagged and Tagged Baby!
Bagged = the bag
Tagged = 1st use of my custom-made labels
Baby = Small, cute human infant ;) 


.jpg)


.JPG)


.jpg)


0 comments:
Post a Comment
Hi there! If you would like to be notified by email when I (or anyone else) replies to your comment please click the 'Subscribe by email' link under this comment box.